


Learning how to set up dual monitors is the single best upgrade you can make for your desk in 2026. Whether you are rocking a custom PC with an RTX 5090 or a base model MacBook Air, adding a second display increases your screen real estate by 100%. This guide covers everything from cable selection to OS configuration. If you spend more than four hours a day at your desk, you cannot afford to stick with a single panel anymore. Let’s get you sorted.
📋 In This Article
Check Your Ports and Cables First

Before you buy anything, look at your GPU or laptop. Most modern GPUs like the NVIDIA RTX 5090 have three DisplayPort 2.1 ports and one HDMI 2.1 port. If you are using a laptop, you likely need a USB-C hub with DisplayPort Alt Mode. Don’t cheap out on cables. A generic $8 HDMI cable from Amazon often fails to hit 144Hz at 4K. I suggest picking up a VESA-certified DisplayPort 2.1 cable for about $25. It ensures you don’t get flickering or weird color shifts. If you have a Mac, make sure your dock supports dual extended displays, as many cheaper USB-C hubs only support mirrored mode, which is completely useless for productivity. Check your monitor specs for the input type before ordering cables.
HDMI 2.1 vs DisplayPort 2.1
DisplayPort 2.1 is the gold standard for PC gaming and high-refresh-rate work. It supports higher bandwidth than HDMI 2.1, meaning you can push 4K at 240Hz without compression. If you have an NVIDIA card, stick to DisplayPort. If you are using a console or a TV as a second monitor, HDMI 2.1 is fine, but double-check that your monitor’s HDMI port actually supports the full bandwidth, as some budget 144Hz panels limit HDMI to 60Hz.
Configuring Windows and macOS Settings
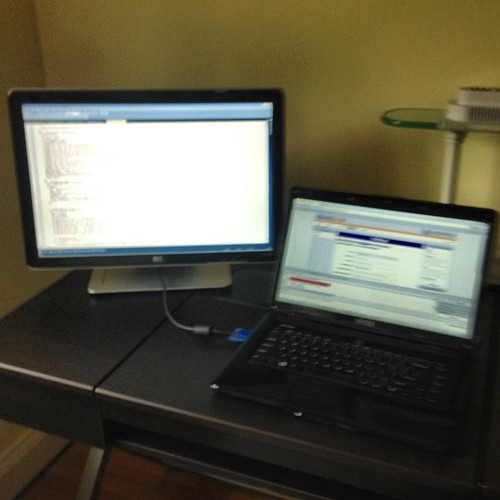
Once you plug everything in, your computer won’t always guess your desk layout correctly. On Windows 11, right-click your desktop and go to ‘Display Settings’. You will see two numbered boxes. Click ‘Identify’ to see which is which, then drag them so they match your physical setup. If your monitor is on the left, drag that box to the left. For macOS Sequoia users, the process is nearly identical in System Settings under ‘Displays’. One pro tip: set your main monitor as the primary display. This ensures your taskbar and notifications always pop up on the screen you actually look at, rather than the secondary monitor you use for Discord or Slack.
Fixing Mouse Alignment Issues
If your mouse feels ‘stuck’ when moving between screens, it’s because the OS thinks your monitors are different heights. In the Display settings menu, drag the boxes up or down until the bottom edges align. This makes the transition between screens feel seamless. If you have one 27-inch 4K monitor and one 24-inch 1080p monitor, the scaling will be weird. Use the ‘Scale and layout’ setting to bump the 4K screen to 150% to make text readable.
Choosing the Right Mounts and Arms
Don’t just use the stands that come in the box. They take up way too much desk space. I personally use the VIVO dual monitor desk mount, which costs about $45 on Amazon. It clamps to the back of the desk and clears up room for your keyboard and mousepad. Ensure your monitors have a VESA mount on the back (the 100x100mm four-hole pattern). If you have a curved ultrawide, verify the weight limit of the arm. A heavy 34-inch monitor will make cheaper arms sag over time. Investing in a solid gas-spring arm saves your neck and creates a much cleaner, professional aesthetic for your workspace.
VESA Compatibility Check
Not all monitors are VESA compatible. Some budget panels from brands like Acer or LG have weird proprietary stands. If your monitor doesn’t have the four holes, look for a VESA adapter bracket. These usually cost $20 and bolt onto the existing stand mount. It’s an extra step, but having your monitors at eye level is mandatory for long-term comfort and preventing back strain.
Solving Common Dual Monitor Issues
The most common problem? One monitor looks washed out compared to the other. This usually happens because you have different panel types—like an IPS panel next to a VA panel. You can try to calibrate them using the built-in Windows Color Calibration tool, but it’s never perfect. Another frequent issue is the ‘ghosting’ or ‘stuttering’ on the second monitor. This often happens if one monitor is set to 144Hz and the other is at 60Hz. Windows 11 handles mixed refresh rates much better than it used to, but you still need to manually set both to their max refresh rate in the Advanced Display settings menu.
Handling Mixed Refresh Rates
If you notice your mouse cursor stutters when moving from a 144Hz monitor to a 60Hz monitor, it’s a known driver limitation. Ensure your GPU drivers are updated to the latest version. If the issue persists, try disabling ‘Hardware-accelerated GPU scheduling’ in Windows settings. It’s a niche fix, but it solves the micro-stuttering for a lot of users running high-refresh gaming displays alongside standard office monitors.
⭐ Pro Tips
- Use a $25 VESA-certified DisplayPort 2.1 cable to avoid flicker on high-refresh displays.
- Save $50 by buying a dual monitor arm on sale instead of two separate single arms.
- Always match your monitor scaling in Windows settings; setting one to 100% and another to 150% often makes dragging windows between screens look jarring.
Frequently Asked Questions
How to set up dual monitors on Windows 11?
Plug in your cables, right-click the desktop, go to Display Settings, and drag the monitor boxes to match your physical desk layout. Click ‘Apply’ to save the changes.
Is a dual monitor setup better than one ultrawide?
Yes, for productivity. Dual monitors give you distinct boundaries for snapping windows. Ultrawides are great for immersion, but they are often more expensive and harder to manage for multitasking.
How much does a decent dual monitor setup cost?
You can get a solid setup for around $350. That buys you two 24-inch 1080p 100Hz IPS monitors ($150 each) plus a $50 dual monitor desk mount.
Final Thoughts
Setting up dual monitors is the ultimate productivity hack. Once you get used to having a dedicated screen for references and one for your main work, you will never go back to a single panel. Start by checking your ports, grab a decent desk arm to save space, and configure your OS settings to match your desk. If you have questions about specific monitor pairings, drop a comment below and let’s get your desk dialed in.


GIPHY App Key not set. Please check settings