


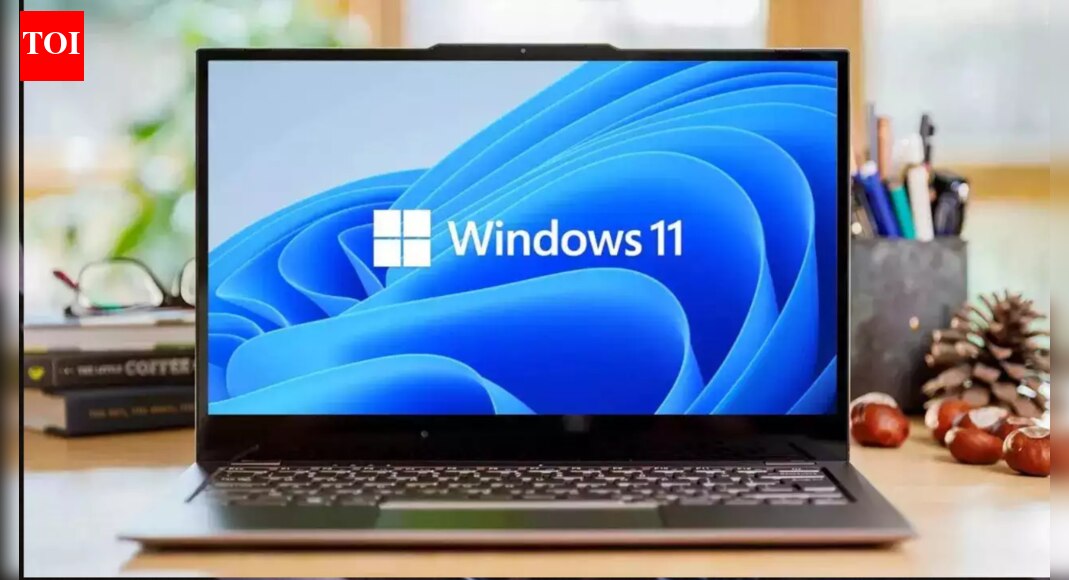
Feeling like your Windows 11 PC is dragging its feet? You’re not alone. Many users report sluggishness, even on relatively new systems. The good news is, you can significantly improve your Windows 11 performance with a few key upgrades and software tweaks. I’ve been building PCs for years, and I’ve seen firsthand how much difference the right changes make. Today, I’ll walk you through the most effective ways to make your Windows 11 machine feel snappy again, from hardware boosts to essential operating system optimizations. Let’s get your PC running like it should.
📋 In This Article
The Single Biggest Speed Boost: SSD & RAM Upgrades

Look, if your PC is still running on a mechanical hard drive (HDD), that’s your number one bottleneck. Period. Upgrading to an NVMe Solid State Drive (SSD) is the most impactful change you can make to speed up Windows 11 performance. We’re talking boot times going from minutes to seconds, applications launching instantly, and file transfers flying. A Samsung 990 Pro 2TB NVMe Gen4 SSD, which I recently picked up for around $185, can hit sequential read speeds of 7,450 MB/s. If you’re on an older system with a SATA SSD, even a jump to Gen4 or Gen5 NVMe, like a Crucial T705 2TB for $319, will show noticeable improvements in demanding tasks. Beyond storage, insufficient RAM will choke your system. 8GB is barely enough for basic web browsing these days; 16GB is the minimum I recommend, and 32GB of DDR5-6000MHz RAM (around $110 for a kit) is ideal for heavy multitasking and gaming. These aren’t just minor tweaks; they’re foundational improvements that literally change how your PC feels.
NVMe Gen4 vs. Gen5: Is the Upgrade Worth It?
For most everyday users, a good Gen4 NVMe SSD is still fantastic value. You’ll get phenomenal speeds that saturate most tasks. However, if you’re a content creator working with massive video files, or a professional developer compiling huge projects, a Gen5 drive like the Crucial T705 offers double the theoretical bandwidth, pushing sequential reads over 14,500 MB/s. While the real-world difference isn’t always double, it cuts down serious wait times on specific workloads. For gamers, the jump from Gen4 to Gen5 might only shave a second or two off load times, so a Gen4 remains the sweet spot for price-to-performance.
Why 16GB RAM is the New Minimum (and 32GB is Better)
Windows 11 itself, plus a few browser tabs and a chat app, can easily eat up 8GB of RAM. Try opening a demanding game or a professional application like Adobe Premiere Pro, and your system will start swapping to the much slower page file on your drive, causing massive slowdowns. I’ve seen systems with 8GB RAM hit 90% usage just idling. Bumping to 16GB ensures you have headroom for daily tasks, while 32GB provides a buttery-smooth experience even with multiple apps, virtual machines, or heavy gaming sessions running concurrently. DDR5 also offers higher clock speeds and lower latencies than DDR4, further enhancing system responsiveness.
Declutter Your Digital Life: Startup Apps & Background Processes
Once your hardware is sorted, it’s time to tackle the software bloat. Windows 11, like its predecessors, loves to launch a dozen apps at startup you don’t actually need immediately. Each one consumes precious RAM and CPU cycles, slowing down your boot and overall system responsiveness. I always start by heading into Task Manager (Ctrl+Shift+Esc), going to the ‘Startup apps’ tab, and disabling anything that doesn’t absolutely need to launch with Windows. Think Spotify, Discord, Adobe Creative Cloud updaters, or even printer utilities. Microsoft’s own ‘PC Manager’ tool, available for free, also offers a quick ‘Boost’ button to clear temporary files and optimize some settings, which can be surprisingly effective for a quick clean-up. Don’t let apps you barely use hog resources in the background.
Taming Startup Apps: What to Disable and What to Keep
When you’re in Task Manager’s Startup tab, look for anything with a ‘High’ impact that you don’t use daily. Your antivirus? Keep it enabled. Cloud sync like OneDrive or Google Drive? Keep it if you rely on it. Everything else, like game launchers (Steam, Epic Games), communication apps (Slack, Teams), or manufacturer utilities (RGB software, system monitors), can usually be disabled. They’ll still launch when you manually open them. This simple step can shave 5-10 seconds off your boot time and free up hundreds of MBs of RAM, directly impacting how fast your PC feels after login.
Background Apps: The Silent Resource Hogs
Windows 11 also allows many apps to run in the background, updating data, sending notifications, and consuming resources even when you’re not actively using them. Go to ‘Settings’ > ‘Apps’ > ‘Installed apps’, click the three dots next to an app, then ‘Advanced options’. Here you can set ‘Let this app run in background’ to ‘Never’. Do this for apps you don’t need constantly running, like weather apps, news feeds, or certain store apps. For example, I disable most of these; I don’t need the Xbox app constantly checking for updates if I’m not gaming.
Refine Windows 11 Settings for Optimal Performance
Beyond hardware and startup programs, Windows 11 has a ton of settings you can tweak to claw back some performance. The operating system ships with many visual bells and whistles enabled by default, which look nice but consume GPU and CPU cycles. Disabling fancy animations and transparency effects is an easy win, especially on older or less powerful systems. I always go into ‘System’ > ‘About’ > ‘Advanced system settings’ > ‘Performance Settings’ and select ‘Adjust for best performance’. This instantly turns off most visual effects, making the UI feel snappier, even if it looks a bit more utilitarian. Don’t forget to adjust your power plan either; many laptops default to ‘Balanced’ when ‘High performance’ might be better for your workload, provided you’re plugged in.
Disabling Visual Effects: A Quick UI Boost
Those subtle fade-ins, shadows under windows, and transparent effects in Windows 11’s UI look slick, but they’re not free. Each animation requires rendering power. By unchecking options like ‘Animate windows when minimizing and maximizing’ or ‘Fade or slide menus into view’ in the Performance Options, you’re telling Windows to just draw things instantly. On a high-end gaming PC, you might not notice much, but on an older laptop with integrated graphics, the difference is substantial. Your mouse clicks and window movements will feel more immediate and responsive, which is a big part of perceived speed.
Power Plans and Gaming Mode: Get Every Ounce of Power
For desktops, ensure your power plan is set to ‘High performance’ in ‘Control Panel’ > ‘Hardware and Sound’ > ‘Power Options’. This prevents your CPU from downclocking when it could be giving you full power. On laptops, use ‘High performance’ when plugged in, but switch to ‘Balanced’ or ‘Power saver’ when on battery to maximize endurance. Additionally, Windows 11’s ‘Gaming Mode’ (Settings > Gaming > Game Mode) can help by prioritizing game processes and suspending background tasks. While it won’t magically double your FPS, it can reduce stuttering and improve consistency in demanding titles by dedicating more resources to the game.
Essential Maintenance: Keep Your System Clean and Updated
Even with hardware sorted and settings tweaked, a neglected Windows installation will eventually slow down. Regular maintenance isn’t glamorous, but it’s crucial. I always recommend running Disk Cleanup (type ‘Disk Cleanup’ in search) at least once a month to get rid of temporary files, old Windows update files, and cached data that can accumulate gigabytes over time. For SSDs, you don’t need to defragment, but ensure ‘Optimize Drives’ is running its TRIM function. For HDDs, regular defragmentation is still important. Crucially, keep your drivers updated. Outdated graphics drivers, chipset drivers, or network drivers can lead to instability and performance drops. Use tools like NVIDIA GeForce Experience, AMD Adrenalin Software, or Intel Driver & Support Assistant to keep GPU drivers current, and check your motherboard manufacturer’s site for chipset updates. A clean, updated system is a fast system.
The Power of Disk Cleanup and Drive Optimization
Disk Cleanup is an underappreciated tool. I’ve seen it free up 20-30GB on systems that haven’t been cleaned in a year. Pay special attention to ‘Windows Update Cleanup’ and ‘Temporary files.’ For SSDs, the ‘Optimize Drives’ tool ensures TRIM commands are sent, which helps maintain write performance over time by telling the SSD which data blocks are no longer in use. Don’t manually defragment an SSD; it’s unnecessary and can reduce its lifespan. For traditional HDDs, defragmentation still helps organize data for faster access, so schedule it regularly if you still have one.
Driver Updates: Often Overlooked, Always Important
I can’t stress this enough: outdated drivers cause so many problems. Graphics drivers, in particular, are frequently updated with performance improvements and bug fixes for new games and applications. Running an older GPU driver could mean leaving 5-10% performance on the table in a new title. Chipset drivers improve communication between your CPU, RAM, and other components. If you’re experiencing random crashes or slow peripheral performance, drivers are often the culprit. Set a reminder to check for major driver updates every couple of months, especially for your GPU.
Advanced Tweaks and When to Consider a Fresh Install

For those comfortable digging a little deeper, there are a few more advanced tweaks to consider. Disabling certain Windows services that you don’t use can free up a tiny bit of RAM and CPU, but be careful not to disable critical ones. Services like ‘Print Spooler’ (if you don’t have a printer) or ‘Fax’ are safe to stop. You can access these via ‘services.msc’. Another area to look at is virtualization. Features like ‘Memory Integrity’ (in Core Isolation settings) or ‘Hyper-V’ (if you’re not using VMs) can sometimes impact performance. While they offer security benefits, disabling them might give you a slight boost. Ultimately, if your system is still sluggish after all these steps, or if you’ve accumulated years of software installations and uninstalls, a fresh installation of Windows 11 is often the ultimate solution. It’s a pain, but it guarantees a clean slate, often making your PC feel brand new.
Disabling Unnecessary Windows Services
Before messing with services, create a restore point! Some services are critical. Focus on services that have a ‘Manual’ or ‘Automatic (Delayed Start)’ startup type and are clearly related to hardware or features you don’t use. For example, if you never use Bluetooth, you could set the ‘Bluetooth Support Service’ to ‘Disabled’. The performance gain here is usually minimal, but it’s about optimizing every little bit. I generally don’t mess with ‘Automatic’ services unless I know exactly what they do and that I don’t need them.
When a Fresh Windows 11 Install is the Best Option
Sometimes, after years of installing and uninstalling software, driver conflicts, and registry bloat, no amount of tweaking will bring your system back to peak performance. This is where a clean install shines. It wipes everything and reinstalls Windows 11 from scratch, giving you a pristine, factory-fresh operating system. Back up all your important data first! I recommend doing a clean install every 2-3 years, or whenever you get a new SSD. It’s a time investment, but the performance payoff is immense and often makes your PC feel like it’s brand new again.
⭐ Pro Tips
- Always use a quality antivirus like Microsoft Defender or Bitdefender Total Security ($49.99/year) to prevent malware slowing down your system.
- Set your Windows 11 power plan to ‘High performance’ when plugged in for maximum CPU clock speeds, especially on desktops.
- Regularly clean your PC’s internal components (fans, heatsinks) from dust. Overheating causes thermal throttling, reducing performance by 10-20%.
- Before making major system changes (like disabling services or registry edits), always create a System Restore Point.
- Avoid installing unnecessary browser extensions; they consume RAM and CPU, slowing down your web browsing experience significantly.
Frequently Asked Questions
Does Windows 11 require more RAM than Windows 10?
Yes, generally. While minimums are similar, Windows 11 has more background processes and visual elements. I recommend 16GB of RAM for a smooth experience, compared to 8GB being more acceptable on Windows 10 for basic use. More RAM prevents frequent disk swapping, which is a major slowdown.
How much does it cost to upgrade my PC to speed up Windows 11?
A significant upgrade like a 1TB NVMe Gen4 SSD costs around $80-120. A 16GB DDR5-6000 RAM kit is about $60-80. You could see a dramatic performance boost for under $200. If you need a new CPU/motherboard, that’s a larger investment, starting around $400-500 for a mid-range combo.
Is buying a new SSD or more RAM better for Windows 11 performance?
If you’re on an HDD, an SSD is by far the biggest improvement. If you already have an SSD but only 8GB of RAM, then more RAM will provide a better boost. Ideally, both are important. Check your Task Manager’s ‘Performance’ tab to see which resource (Disk or Memory) is consistently at 100% during slowdowns.
Will disabling visual effects in Windows 11 make a big difference?
It depends on your hardware. On older PCs with integrated graphics or less powerful CPUs, disabling visual effects can make the UI feel significantly snappier and more responsive. On high-end systems, the impact is minimal, but it still frees up a tiny bit of GPU/CPU resources, so it’s a quick, free tweak.
Is it safe to use third-party Windows 11 optimization tools?
Be very cautious. Many third-party ‘optimizers’ can do more harm than good, deleting necessary files or making unstable registry changes. Stick to built-in Windows tools like Disk Cleanup, Task Manager, and Settings. If you use one, research it thoroughly and always create a restore point first. Microsoft’s PC Manager is a safe bet.
Final Thoughts
Getting your Windows 11 PC to run at its best doesn’t have to be a mystery. My experience tells me that a solid NVMe SSD and sufficient DDR5 RAM are the biggest performance multipliers. After that, it’s all about diligent software management: trim startup apps, disable background processes, and fine-tune your Windows settings. Don’t forget regular maintenance like driver updates and disk cleanup. If your PC is still crawling after all these steps, a fresh Windows 11 install is a powerful reset button. Take action now – your PC will thank you for it. Go check your Task Manager and see where your bottlenecks are!


GIPHY App Key not set. Please check settings